
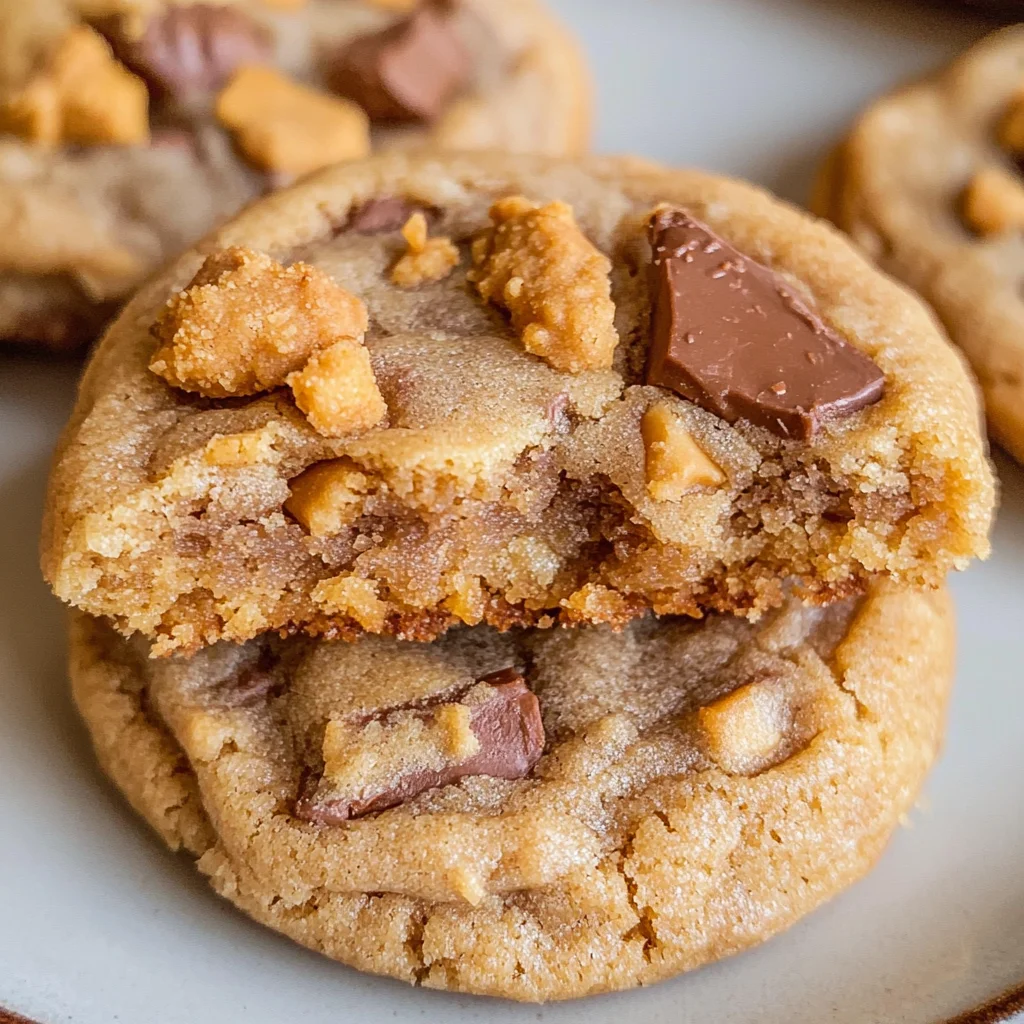
These Peanut Butter Butterfinger Cookies are a true delight! Combining rich peanut butter with crunchy Butterfinger bits transforms a classic cookie into something extraordinary. Perfect for parties, bake sales, or just a sweet treat at home, these cookies boast a thick and chewy texture that will leave you craving more. Get ready to impress your family and friends with this simple yet indulgent recipe!
Why You’ll Love This Recipe
- Irresistible Flavor: The combination of peanut butter and Butterfinger creates a unique taste that’s both sweet and nutty.
- Easy to Make: With simple ingredients and straightforward steps, anyone can whip these up in no time.
- Perfect for Any Occasion: Whether it’s a birthday party or a cozy night in, these cookies fit right in!
- Freezable Dough: Make a batch ahead of time and freeze the dough for fresh cookies whenever you want.
Tools and Preparation
To create these delicious Peanut Butter Butterfinger Cookies, having the right tools will make the process even smoother. Below are the essential tools you’ll need.
Essential Tools and Equipment
- Stand mixer or large mixing bowl
- Measuring cups and spoons
- Cookie scoop or tablespoon
- Baking sheets
- Parchment paper or silicone baking mat
- Wire rack
Importance of Each Tool
- Stand mixer or large mixing bowl: A stand mixer helps to thoroughly combine ingredients quickly, ensuring smooth dough without effort.
- Cookie scoop or tablespoon: This tool ensures uniform cookie sizes for even baking and perfect presentation.
- Parchment paper or silicone baking mat: Using these prevents sticking, making cleanup easier.
Ingredients
For the Cookie Base
- 3/4 cup butter (softened (1 and 1/2 sticks))
- 1/2 cup granulated sugar
- 1/2 cup brown sugar (packed)
- 1 cup peanut butter (don’t use natural pb)
- 1 large egg
- 1 & 1/2 teaspoons vanilla
For the Dry Ingredients
- 1 & 1/2 cups all-purpose flour (spooned and leveled)
- 1/2 teaspoon baking soda
- 1/2 teaspoon baking powder
- 1/4 teaspoon kosher salt
For the Crunchy Element
- 16 ounces Butterfinger (chopped)
How to Make Peanut Butter Butterfinger Cookies
Step 1: Cream the Butters and Sugars
In a large bowl or stand mixer, beat 3/4 cup softened butter until smooth and creamy. Scrape down the sides as needed. Then add 1/2 cup granulated sugar and 1/2 cup packed brown sugar. Beat well for about 2 minutes until fluffy—no chunks of butter should remain.
Step 2: Mix in Peanut Butter and Egg
Add 1 cup of peanut butter to the mixture. I recommend using Jif for best results! After that, crack in 1 large egg along with 1 & 1/2 teaspoons vanilla extract. Beat until everything is fully combined, scraping the sides occasionally.
Step 3: Combine Dry Ingredients
Spoon 1 & 1/2 cups all-purpose flour into your measuring cup, leveling it off before adding it to your mixing bowl. Do not stir yet! Instead, sprinkle on top: 1/2 teaspoon baking soda, 1/2 teaspoon baking powder, and 1/4 teaspoon kosher salt. Stir gently to mix the dry ingredients while breaking up any clumps.
Step 4: Form the Dough
Turn on your mixer to blend the dough just until it barely comes together—some flour may still be visible. Stop mixing when this happens to avoid tough cookies.
Step 5: Add Butterfingers
Fold in your chopped Butterfinger pieces until they are just incorporated into the dough. If you can’t find “Butterfinger Bits,” feel free to chop your own!
Step 6: Chill the Dough
Cover your bowl with plastic wrap and chill in the refrigerator for at least 15 minutes or up to an hour if you prefer—this step enhances flavor and texture!
Step 7: Preheat Oven
While waiting for your dough to chill, preheat your oven to 350°F (175°C). Line two baking sheets with parchment paper or silicone mats.
Step 8: Shape Cookies
Using a cookie scoop or tablespoon, form balls of dough about two inches in diameter. Place them on your prepared baking sheets at least an inch apart.
Step 9: Bake Cookies
Bake at 350°F for approximately 10 minutes. They should appear puffy with set edges but not shiny centers. If they haven’t spread much during baking, gently press down on each cookie with a spatula after removing them from the oven.
Step 10: Cool Down
Let them cool on the pan for about five minutes before transferring them to a wire rack where they can cool completely.
Enjoy these delightful Peanut Butter Butterfinger Cookies as an unforgettable treat!
How to Serve Peanut Butter Butterfinger Cookies
Peanut Butter Butterfinger Cookies are delightful on their own, but they can be even better with a few serving suggestions. Here are some ideas to elevate your cookie experience.
Pair with Milk
- A classic choice, pairing these cookies with a cold glass of milk enhances the rich peanut butter flavor and complements the sweetness of the Butterfinger bits.
Serve with Ice Cream
- Top a warm cookie with a scoop of vanilla or chocolate ice cream for an indulgent dessert. The melting ice cream contrasts beautifully with the cookie’s texture.
Create a Cookie Sandwich
- Take two cookies and fill them with your favorite frosting or peanut butter for a delicious cookie sandwich that adds an extra layer of flavor.
Drizzle with Chocolate
- Melt some dark or milk chocolate and drizzle it over the cookies for an added touch of sweetness and visual appeal. This creates a decadent treat perfect for special occasions.
Add Fresh Fruit
- Serve these cookies alongside fresh fruit like strawberries or bananas. The fruity freshness balances the richness of the cookies, making for a well-rounded snack.
Enjoy with Coffee or Tea
- Pairing these cookies with a hot cup of coffee or tea can enhance your dessert experience. The warmth from the beverage pairs nicely with the soft texture of the cookie.
How to Perfect Peanut Butter Butterfinger Cookies
Perfecting your Peanut Butter Butterfinger Cookies is all about technique and attention to detail. Here are some tips to make them even more delicious.
-
Use Room Temperature Ingredients: Ensure that your butter and egg are at room temperature before mixing. This helps create a smooth dough and improves texture.
-
Don’t Overmix: When combining wet and dry ingredients, mix just until incorporated. Overmixing can lead to tougher cookies.
-
Chill Your Dough: Refrigerating your dough for at least 15 minutes before baking helps the flavors meld and results in thicker cookies.
-
Watch Your Baking Time: Keep an eye on the cookies as they bake. They should be puffy and just set around the edges without being shiny in the middle.
-
Press Down After Baking: If your cookies don’t spread much while baking, gently press down on them right after they come out of the oven for a better shape.
-
Store Properly: To maintain freshness, store leftover cookies in an airtight container at room temperature for up to three days.
Best Side Dishes for Peanut Butter Butterfinger Cookies
While these cookies shine on their own, pairing them with delightful side dishes can enhance your dessert table. Here are some great suggestions:
-
Yogurt Parfait
Layer yogurt with granola and berries for a refreshing contrast to the rich cookies. -
Fruit Salad
A mix of seasonal fruits provides a light and vibrant complement to the sweet flavors of the cookies. -
Chocolate Fondue
Set up a chocolate fondue station where guests can dip fruits or pretzels alongside their cookies for added fun. -
Cheese Platter
A selection of cheeses, especially creamy varieties like brie or mascarpone, pairs surprisingly well with peanut butter flavors. -
Nut Mix
A bowl of mixed nuts offers a crunchy texture that contrasts nicely with soft cookies while enhancing nutty flavors. -
Trail Mix Bars
These no-bake bars made from oats, nuts, and dried fruits provide an energy boost alongside your sweet treats. -
Mini Cupcakes
Offer small cupcakes in flavors like vanilla or chocolate to create a delightful dessert variety that pairs well with peanut butter treats. -
Ice Cream Sundae Bar
Allow guests to build their sundaes using ice creams and toppings; this interactive option complements your Peanut Butter Butterfinger Cookies perfectly!
Common Mistakes to Avoid
Baking can be tricky, and small mistakes can lead to less-than-perfect cookies. Here are some common pitfalls to watch out for when making Peanut Butter Butterfinger Cookies.
- Using Natural Peanut Butter: Natural peanut butter can alter the texture of your cookies. Opt for a creamy, commercial brand like Jif for the best results.
- Overmixing the Dough: Mixing too long can lead to tough cookies. Combine ingredients just until they come together for a soft, chewy texture.
- Skipping the Chilling Step: Failing to chill the dough may result in cookies that spread too much during baking. Allow at least 15 minutes in the fridge to help maintain shape.
- Not Measuring Flour Correctly: Spoon and level your flour instead of scooping directly from the bag. This prevents using too much flour, which can make cookies dense.
- Ignoring Oven Temperatures: Every oven is different. Use an oven thermometer to ensure yours is accurate and adjust as needed for perfect baking.
Refrigerator Storage
- Store cookies in an airtight container for up to 3 days.
- Place parchment paper between layers to prevent sticking.
- Keep them in a cool area away from direct sunlight.
Freezing Peanut Butter Butterfinger Cookies
- Freeze cookie dough balls in a ziplock bag for up to 3 months.
- Label the bag with the date and contents for easy identification.
- You can also freeze baked cookies in a sealed container for up to 4 weeks.
Reheating Peanut Butter Butterfinger Cookies
- Oven: Preheat to 350°F and warm cookies on a baking sheet for 5-7 minutes.
- Microwave: Heat individual cookies for about 10-15 seconds until warm.
- Stovetop: Place a few cookies in a pan over low heat, covering it briefly until warmed through.
Frequently Asked Questions
How do I make Peanut Butter Butterfinger Cookies gluten-free?
You can substitute all-purpose flour with a gluten-free flour blend. Ensure it contains a binding agent like xanthan gum.
Can I use another type of chocolate candy instead of Butterfinger?
Absolutely! Feel free to experiment with other candies like Snickers or Milky Way for delicious variations.
How long do Peanut Butter Butterfinger Cookies last?
These cookies last up to 3 days at room temperature or up to 4 weeks if frozen properly.
What makes these Peanut Butter Butterfinger Cookies so special?
The combination of rich peanut butter and crunchy Butterfinger bits gives these cookies an irresistible texture and flavor that’s hard to beat.
Final Thoughts
Peanut Butter Butterfinger Cookies are not only delicious but also versatile. Customize them by adding nuts or swapping out candies according to your preferences. These cookies are sure to impress friends and family alike, so don’t hesitate—give this recipe a try!

Peanut Butter Butterfinger Cookies
- Total Time: 25 minutes
- Yield: Approximately 24 cookies 1x
Description
Indulge in the delight of Peanut Butter Butterfinger Cookies, a perfect blend of creamy peanut butter and crunchy Butterfinger bits. These cookies are an irresistible treat with a thick, chewy texture that promises to satisfy your sweet tooth. Ideal for any occasion—from casual snacks at home to festive gatherings—this easy recipe will impress family and friends alike. With just a few simple ingredients and straightforward steps, you can whip up a batch of these decadent cookies in no time. Plus, the dough can be frozen for future cravings, making them as convenient as they are delicious. Get ready to savor every bite!
Ingredients
- 3/4 cup softened butter
- 1/2 cup granulated sugar
- 1/2 cup packed brown sugar
- 1 cup creamy peanut butter
- 1 large egg
- 1 & 1/2 teaspoons vanilla extract
- 1 & 1/2 cups all-purpose flour
- 1/2 teaspoon baking soda
- 1/2 teaspoon baking powder
- 1/4 teaspoon kosher salt
- 16 ounces chopped Butterfinger candy
Instructions
- Preheat oven to 350°F (175°C) and line baking sheets with parchment paper.
- In a large bowl or stand mixer, cream together the softened butter, granulated sugar, and brown sugar until fluffy.
- Mix in the peanut butter, egg, and vanilla extract until well combined.
- In a separate bowl, whisk together the flour, baking soda, baking powder, and salt.
- Gradually add the dry ingredients to the wet mixture; mix until just combined.
- Fold in the chopped Butterfinger bits.
- Chill the dough for at least 15 minutes before forming into balls about two inches in diameter.
- Bake for approximately 10 minutes or until puffy with set edges.
- Allow cooling on the pan for five minutes before transferring to a wire rack.
- Prep Time: 15 minutes
- Cook Time: 10 minutes
- Category: Dessert
- Method: Baking
- Cuisine: American
Nutrition
- Serving Size: 1 cookie (30g)
- Calories: 150
- Sugar: 10g
- Sodium: 120mg
- Fat: 7g
- Saturated Fat: 3g
- Unsaturated Fat: 4g
- Trans Fat: 0g
- Carbohydrates: 19g
- Fiber: 1g
- Protein: 3g
- Cholesterol: 20mg