
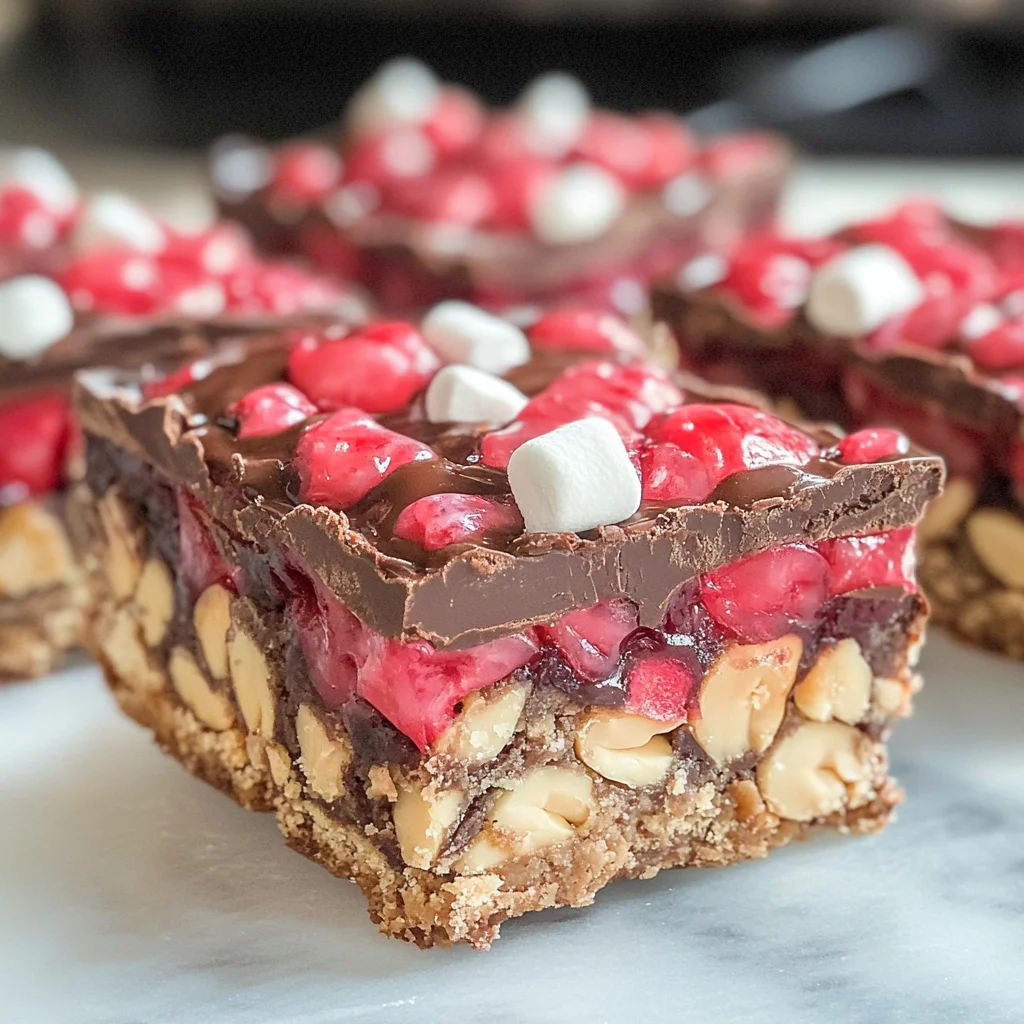
These Homemade Cherry Mash Bars are a delightful treat that combines a sweet cherry candy layer with a rich chocolate peanut butter topping. Perfect for dessert, snacking, or holiday gifting, these bars showcase bold cherry flavors enhanced by vegan marshmallows and crunchy peanuts. Easy to make, they are even better than the classic candy bar!
Why You’ll Love This Recipe
- Quick and Easy: With just 20 minutes of total time, you can whip up these delicious bars in no time.
- Rich Flavor: The combination of cherry and chocolate creates an indulgent taste experience.
- Versatile Treat: Perfect for any occasion—whether it’s a party, holiday gift, or just a sweet snack at home.
- No Baking Required: Enjoy the simplicity of no-bake bars that set perfectly in the fridge.
- Crowd-Pleaser: These bars are sure to impress family and friends with their unique flavor profile.
Tools and Preparation
Gathering the right tools will make your preparation easy and efficient. Here’s what you’ll need to create these delicious homemade cherry mash bars.
Essential Tools and Equipment
- Saucepan
- Baking dish (9×13 inches)
- Double boiler
- Mixing spoon
Importance of Each Tool
- Saucepan: Ideal for melting ingredients together smoothly without burning.
- Baking Dish: A 9×13-inch dish provides ample space for cooling your bars evenly.
- Double Boiler: Ensures that chocolate melts gently to maintain its smooth texture.
Ingredients
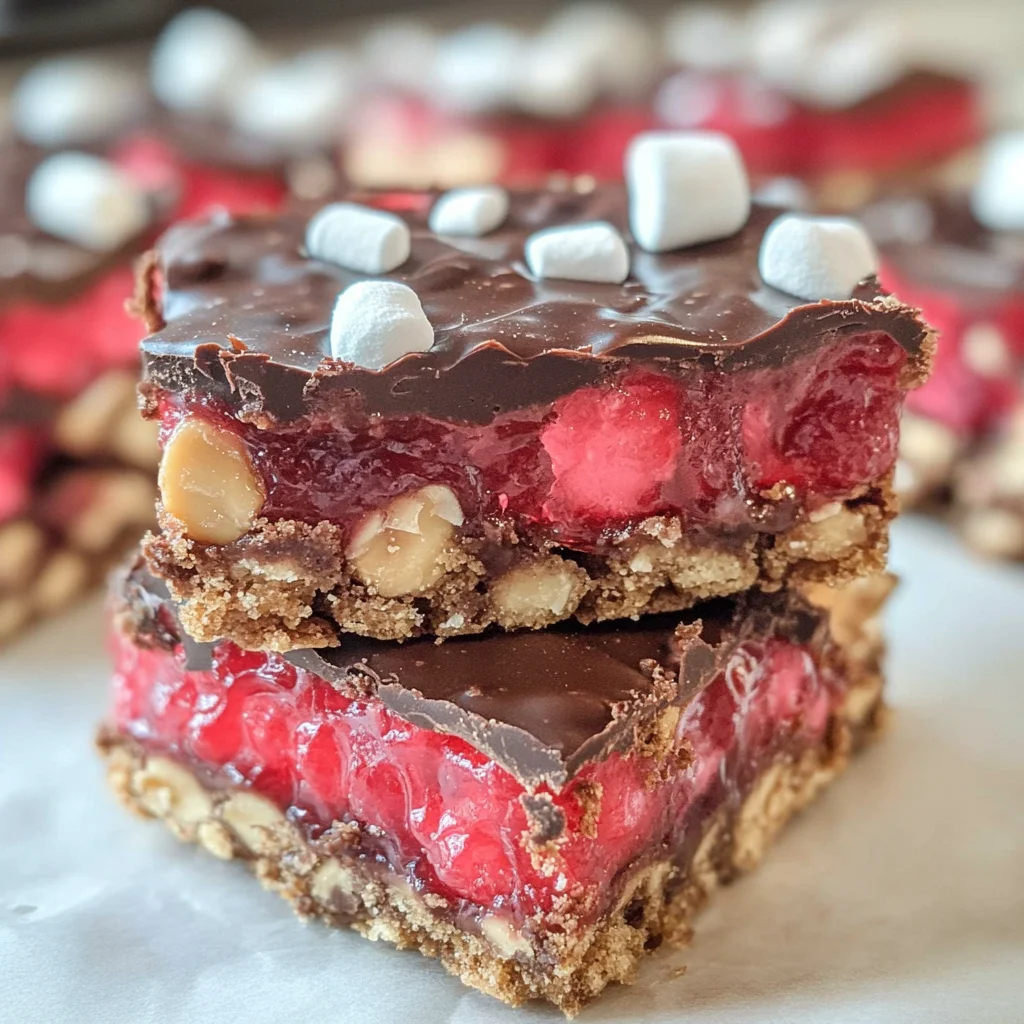
These homemade cherry mash bars feature a sweet cherry candy layer topped with a rich chocolate peanut butter layer. Packed with cherry flavor, vegan marshmallows, and crunchy peanuts, these bars are a delightful treat perfect for dessert, snacking, or holiday gifting. Easy to make and even better than the classic candy bar!
For the Cherry Layer
- 2 cups sugar
- 2/3 cup evaporated milk
- 1/8 teaspoon salt
- 12 vegan marshmallows
- 1/2 cup margarine
- 6 ounces cherry chips (or substitute with white almond bark, cherry extract, and red food coloring)
- 1 teaspoon vanilla extract (omit if using cherry extract)
For the Chocolate Peanut Butter Layer
- 12 ounces semi-sweet chocolate chips
- 3/4 cup peanut butter
- 1 cup crushed salted peanuts
How to Make Homemade Cherry Mash Bars
Step 1: Prepare the Baking Dish
Butter a 9×13-inch baking dish thoroughly to prevent sticking.
Step 2: Make the Cherry Layer
- In a saucepan over medium heat, combine:
- 2 cups sugar
- 2/3 cup evaporated milk
- 1/8 teaspoon salt
- 12 vegan marshmallows
-
1/2 cup margarine
-
Bring the mixture to a boil for about 5 minutes.
- Remove from heat and stir in:
- 6 ounces cherry chips (or substitutes)
-
1 teaspoon vanilla extract (if not using cherry extract)
-
Pour this mixture into your prepared baking dish.
Step 3: Prepare the Chocolate Peanut Butter Layer
- Melt the 12 ounces of semi-sweet chocolate chips in a double boiler until smooth.
- Once melted, add:
- 3/4 cup peanut butter
-
1 cup crushed salted peanuts
-
Stir well until combined.
- Spread this chocolate peanut mixture over the cooled cherry layer in the baking dish.
Step 4: Chill and Serve
Refrigerate your bars until completely set before cutting them into squares. Enjoy your delicious homemade cherry mash bars!
How to Serve Homemade Cherry Mash Bars
Serving homemade cherry mash bars can enhance their appeal and make them even more enjoyable. These delightful treats are versatile and can be paired with various accompaniments to create a memorable dessert experience.
With Whipped Coconut Cream
- Lightly sweetened whipped coconut cream adds a creamy texture that complements the cherry flavor perfectly.
As a Snack with Fresh Fruit
- Serve alongside fresh strawberries or blueberries for a refreshing contrast and an extra burst of fruitiness.
Paired with Ice Cream
- A scoop of vanilla or cherry ice cream makes for a delightful combination, adding a cold, creamy element to the rich bars.
Crumbled Over Yogurt
- Break up the bars and sprinkle them over yogurt for a tasty breakfast or snack option that adds crunch and sweetness.
Gift Wrapped for Special Occasions
- Package these bars in decorative boxes or cellophane bags for an appealing gift idea during holidays or celebrations.
How to Perfect Homemade Cherry Mash Bars
Creating the best homemade cherry mash bars requires attention to detail. Here are some tips to ensure they turn out delicious every time.
- Use fresh ingredients: Ensure your cherries and other components are fresh for optimal flavor and texture.
- Monitor cooking time: Keep an eye on the mixture while boiling to avoid burning; it should be bubbly but not overly thick.
- Allow cooling time: Let the bars cool completely before cutting them into squares to maintain their shape.
- Experiment with toppings: Try drizzling melted chocolate or sprinkling crushed nuts on top for added flavor and crunch.
- Store properly: Keep the bars in an airtight container at room temperature or refrigerate them for longer shelf life.
Best Side Dishes for Homemade Cherry Mash Bars
Homemade cherry mash bars shine when served with complementary side dishes. Here are some excellent options that pair well with these sweet treats.
- Vanilla Ice Cream – Classic ice cream contrasting the cherry flavors brings a refreshing chill.
- Fruit Salad – A mix of seasonal fruits adds color and freshness, balancing the richness of the bars.
- Chocolate Sauce – Drizzling warm chocolate sauce over the bars intensifies their indulgence.
- Coffee or Tea – A warm beverage offers a comforting pairing that enhances the dessert experience.
- Cheese Platter – Include soft cheeses like brie or cream cheese to create a savory contrast.
- Granola Parfait – Layering granola and yogurt provides a crunchy, creamy texture that complements the bars nicely.
Common Mistakes to Avoid
When making Homemade Cherry Mash Bars, it’s easy to encounter a few pitfalls. Here are some common mistakes and how to avoid them.
- Using the wrong type of chocolate: Make sure to use semi-sweet chocolate chips for the best flavor. Milk chocolate can overwhelm the cherry taste.
- Not measuring accurately: Baking is a science! Use precise measurements for sugar and liquids to ensure the right consistency in your bars.
- Skipping the refrigeration step: Allowing the bars to chill is crucial for setting. Don’t skip or rush this step; it helps achieve the perfect texture.
- Overcooking the mixture: Boiling the sugar mixture for too long can lead to a hard texture. Keep an eye on it and remove it from heat after 5 minutes.
- Neglecting to line the baking dish: Always butter or line your baking dish. This prevents sticking and makes it easier to cut the bars later.
Storage & Reheating Instructions
Refrigerator Storage
- Store Homemade Cherry Mash Bars in an airtight container.
- They will stay fresh in the refrigerator for about 1 week.
Freezing Homemade Cherry Mash Bars
- Wrap individual bars in plastic wrap and then place them in a freezer-safe bag.
- They can be frozen for up to 3 months.
Reheating Homemade Cherry Mash Bars
- Oven: Preheat to 350°F (175°C). Place bars on a baking sheet for about 5-7 minutes until warmed through.
- Microwave: Heat one bar at a time on medium power for 10-15 seconds until soft.
- Stovetop: Place a bar in a non-stick skillet over low heat, covering with a lid until warmed through, about 2-3 minutes.
Frequently Asked Questions
Here are some frequently asked questions about Homemade Cherry Mash Bars that might help you out!
Can I use fresh cherries instead of cherry chips?
Using fresh cherries isn’t recommended as they contain too much moisture. Stick with cherry chips or dried cherries for the best results.
How can I make these bars gluten-free?
Simply ensure that all ingredients, including chocolate chips and peanut butter, are labeled gluten-free.
What toppings work well with Homemade Cherry Mash Bars?
Consider adding crushed nuts, coconut flakes, or drizzling melted chocolate on top for added flavor and texture.
Can I customize the flavor of these bars?
Absolutely! Experiment with different flavored chips or extracts like almond or vanilla for unique twists on your Homemade Cherry Mash Bars.
How do I cut these bars neatly?
Use a sharp knife and lightly oil it before cutting. This will help prevent sticking and ensure clean edges.
Final Thoughts
Homemade Cherry Mash Bars are a delightful treat that combines sweet cherry flavors with rich chocolate and crunchy peanuts. They are perfect for dessert, snacking, or gift-giving during holidays. Feel free to customize them by adding your favorite nuts or using different flavored chips. Try making them today!
Homemade Cherry Mash Bars
- Total Time: 20 minutes
- Yield: Approximately 16 servings 1x
Description
Indulge in the delightful layers of Homemade Cherry Mash Bars, where a sweet cherry candy layer meets a rich chocolate peanut butter topping. These no-bake treats are perfect for any occasion—whether you’re snacking at home, hosting a party, or searching for the perfect holiday gift. With their vibrant cherry flavor and crunchy peanuts, these bars are sure to impress family and friends alike. Plus, they’re incredibly easy to make, requiring only 20 minutes of total prep time. Let these mouthwatering bars become your new go-to dessert!
Ingredients
- 2 cups sugar
- 2/3 cup evaporated milk
- 12 vegan marshmallows
- 1/2 cup margarine
- 6 ounces cherry chips (or alternatives)
- 12 ounces semi-sweet chocolate chips
- 3/4 cup peanut butter
- 1 cup crushed salted peanuts
Instructions
- Butter a 9×13-inch baking dish.
- In a saucepan, combine sugar, evaporated milk, salt, marshmallows, and margarine over medium heat. Bring to a boil for about 5 minutes.
- Remove from heat and stir in cherry chips (or substitutes). Pour into the prepared dish.
- In a double boiler, melt chocolate chips until smooth. Stir in peanut butter and crushed peanuts until combined.
- Spread the chocolate mixture over the cooled cherry layer. Refrigerate until set before cutting into squares.
- Prep Time: 10 minutes
- Cook Time: 10 minutes
- Category: Dessert
- Method: No-Bake
- Cuisine: American
Nutrition
- Serving Size: 1 serving
- Calories: 210
- Sugar: 23g
- Sodium: 105mg
- Fat: 11g
- Saturated Fat: 3g
- Unsaturated Fat: 8g
- Trans Fat: 0g
- Carbohydrates: 25g
- Fiber: 1g
- Protein: 3g
- Cholesterol: 0mg